A few weeks ago my husband and I bought our girls a pair of
sunglasses each. I treated myself to a new pair too. The sunglasses that our girls already had were pretty scratched and as we’re going on holiday soon, they really needed some new ones.
The thing is I didn’t want these new ones to end up scratched before we’d even left for our holiday. With that in mind I thought that I should make us all some sunglasses cases.
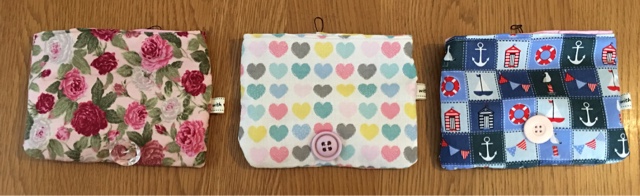
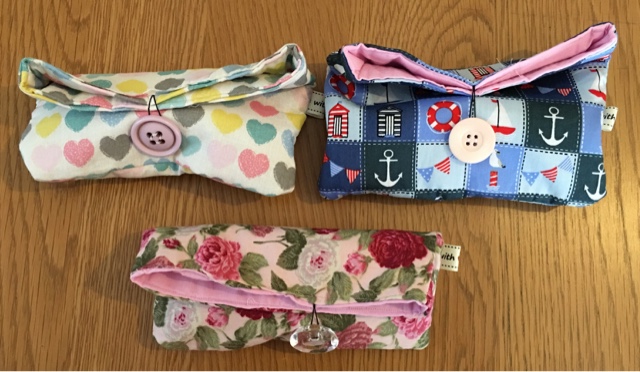
R and M, our four year old twins, chose their own fabrics and buttons. R opted for a blue, nautical themed fabric. M went for a rose print fabric and I went for a heart print fabric.
If you’re looking to make this yourself you’ll also need:
1 button
3″ of elastic cord
2 x 6×8″ Wading (or fusible fleece)
2 x 6×8″ Medium Interfacing
4 x 6×8″ Fabric of your choice
5cm ribbon
These were really easy to make. I made them all in the same day over the course of two hours.
When you’ve got all of your materials cut down to the right size, you’ll need to iron on the wading to the ‘outer’ facing fabric and iron the interfacing onto the ‘inner’ fabric. Tip: I always place a tea towel over my fabric when ironing to prevent any stains transferring from the iron to the fabric.
Fold the ribbon in half and pin to the outer fabric so that the raw edge of the ribbon overlaps the raw edge of the outer fabric (see picture below). Then place the outer facing fabric together so that the right sides are facing inward and sew down the sides and bottom edge. Repeat for the inner fabric.
You’ll then need to sew a seam along the top of the inner fabric to conceal the raw edges. Before doing this tie your elastic thread so that it forms a ‘loop’ shape and pin to the back of the inner fabric so that the loop is facing down.
It’s important to ensure that all of your fabrics are the right way up. The last thing you want is to turn your fabric the right way to discover that the fabric is upside down!
Next turn the inner pouch inside out and place into the outer pouch. The fabrics should now be showing the right way, so that when you look inside the sunglasses case you can see the correct side of the fabric.
Fold the top of the outer fabric inward and pin to the inner fabric to create a seam and then sew around the top to finish the top of the case.
The last thing you’ll need to do is sew the button on. To do this, pop your sunglasses into your case and fold the top of the sunglasses case down so that you can measure where the button should be, and then hand sew the button on. Just don’t forget to take your sunglasses back out before you start sewing!
I’m so pleased with the end results, even if the button is slightly off centre on the rose print one, but then again with handmade products it’s often the imperfections that make them unique.
Our girls are really pleased with their sunglasses cases and so am I!
Related





4 Comments
Mellissa Williams
June 2, 2016 at 7:46 am
Emily, you are so clever! I love these, and they are so inexpensive to make and pretty too. I made a make up bag once that was similar in my sewing class.
Amy Western
June 2, 2016 at 8:02 am
My daughter would love making these, I may set aside a morning on the weekend to do it! Thank you for sharing 🙂
Mummy Fever
June 4, 2016 at 8:02 am
How clever – I'm no good at anything like this so I think you are super talented. Thanks for linking to #sharewithme – hope to see you again.
Honest mum
June 15, 2016 at 2:14 pm
What a lovely post! Might have to try this for my Dad's specs. Thanks x